Joretta Klepfer
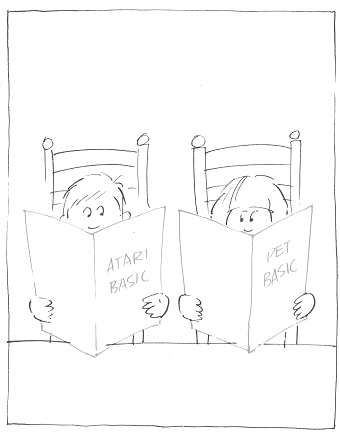
An important item to consider when shopping for a computer is the language that you will use to communicate. You need to decide what features are important for your application and examine the language accordingly. The brand new Atari computers offer yet another version of BASIC to tempt programmers and soon-to-be programmers. The following table is a comparison of the Atari BASIC (not Microsoft) language and the PET (Microsoft) BASIC language. I have indicated various features of each and then commented about the PET and Atari treatment or lack of treatment of that feature.
The table is not an exhaustive treatment of either language, but should assist you in learning the "basics" about both languages. The references used to determine the contents of the table are listed at the end of this article. You will also want to consult the manuals provided with the various computer peripherals to learn more about communication with these devices.
Two sources of information for the Atari BASIC language are provided with the computers: Atari BASIC by Albrecht, Finkel, and Brown and BASIC REFERENCE MANUAL (400-800) by Shaw and Brewster. I would like to share some thoughts with you about each one. Let's start with Atari BASIC.
The message on the binding indicates that Atari BASIC is "A Self-Teaching Guide" and the design of the book is well suited to accomplish that goal. The format uses proven teaching techniques. Each chapter begins with the instructional goals for that section and indicates what your skill levels should be when you finish it. The material is organized into numbered sections called frames, each of which presents information and then quizzes you about it. An important part of the learning process is the active participation on your part in answering the questions (without peeking at the answers) and writing the programs that are requested. By all means, turn your Atari on and use it in conjunction with the book. Another nice feature is the self-test at the end of each chapter and at the end of the book. Answers are given to all the questions, but you will learn more if you take the tests without referring to them. This book is designed to teach BASIC to a novice and, if used properly, will accomplish this task very well.
Atari BASIC is not a reference book however, and BASIC programmers will grow frustrated trying to use it to learn about the Atari brand of BASIC. A welcome addition to the book should be a categorized appendix which lists the Atari BASIC commands, statements, arithmetic and logical operators, special symbols, and variable naming conventions. (The built-in functions are already listed in the appendix, along with the ASCII character codes and error messages.) This type of "quick reference" section would also assist those who use this book to learn BASIC as they may need to refresh their memory from time to time.
The authors indicate in their message "To The Readers" that the BASIC in your new Atari computer may be more advanced than the 8K Atari BASIC they used in writing this book. This comment is an important one and means that you should read carefully all the manuals you receive with your unit to determine what refinements, if any, have been made. I am aware of at least one: Atari BASIC indicates that a variable name may be a single letter or a letter and a number, whereas the BASIC REFERENCE MANUAL gives you the freedom to create variable names of any length up to 120 characters as long as they begin with a letter. This difference should not create a lack of confidence in Atari BASIC, for the variable naming conventions given by Albrecht and company are probably best for beginners and are obviously still valid.
Atari BASIC does not include advanced programming techniques and applications such as creating and manipulating data files. You will also not find information on saving and loading programs on cassette or disk; refer to the special operator's manuals for I/O information on these peripherals.
If you would like to learn Atari BASIC, Atari BASIC is an excellent place to start and I highly recommend it. If you already know BASIC and want to learn the idiosyncrasies of the Atari brand, read on!
I have been reading a preliminary draft of the new BASIC REFERENCE MANUAL which will be shipped with the Atari computers upon its completion. This book is designed in a more traditional manner, presenting information interspersed with examples. Be sure to start by reading the preface and the flowchart of the program for using the manual. Chapter 1 gives a general introduction to the manual and its terminology and notation conventions. A lengthy list of abbreviations is given which you'll refer to frequently as you read through the manual.
The book is written in a friendly, non-threatening manner using a style that explains the BASIC language features in a very "readable," straight-forward way. One very nice feature of the style of text presentation is that the general format of a statement is presented first and then an example is given. For the most part, liberal use of visual aids such as flowcharts, diagrams, tables, and examples will assist you in your search for facts.
I believe that one or two sections will cause some difficulty for the beginning programmer, however. One of these is the section on Input/Output Operations. Dealing with the general format of the OPEN statement is not a trivial exercise and, since the book is aimed at all levels of readers, a different treatment of this complex subject would be easier for the newer computerist to grasp. The section on game controller functions has no examples longer than one line and very little information about the use of these functions. We are told that the "imaginative programmer will think of many uses" for these functions. Help! Atari - I'm not very imaginative and others might not be also; in the final manual please give us some ideas on how to use these unique functions.
I was pleased to find so many useful items in the appendices. There are several user programs and sample routines listed. A directory of BASIC keywords gives not only the keyword and a brief summary, but also gives the chapter number if you need further reference. A necessary listing is included of error messages and their corresponding numbers. Utility listings of Decimal to Hexadecimal conversion tables, and the ATASCII character set as well as PEEK and POKE information assist the serious programmer. A listing of trigonometric functions derived from the built-in functions should interest the scientific programmer. The section on the keyboard and editing features is a good introduction to this input device. It was an excellent idea to include, as an appendice, the glossary and chapter index of the words in the glossary, however I feel this addition should in no way replace a regular index. Hopefully, one will be included in the final edition.
Let me restate that all the comments I have made about the BASIC REFERENCE MANUAL came from examining a rough draft of the document. I look forward to reading the final copy. I have confidence that this manual will provide new Atari owners with ready access to their brand of BASIC.
Variable names
PET Microsoft BASIC: The first two alphanumeric characters form the unique variable name. However, for ease of reading, the name could be as long as you wish. Integer variables are created by adding % to the name. String variables are created by adding $ to the name.
Atari BASIC: Variable names may be any length, given memory limitations, and must start with a letter. 128 different variables are allowed in a single program. Each letter (rather than just the first two) is significant.
Subscripted variables
Three subscripts (i.e. three dimensional variables) are allowed. Original ROM PETs are limited to 255 elements in an array; on the newer models 8/16/32K PETs there is no limit on the number of elements except for memory limitations.
Two subscripts (i.e. two-dimensional variables) are allowed. Subscripts are numbered from 0.
String variables
Character strings may contain up to 255 characters even though the input buffer is limited to 80 characters. The concatenation operator + may be used to create longer strings (within the 255 limit). Non-subscripted string variables need not be dimensioned. Subscripted string variables must be dimensioned if the number of elements in the array is over 10. The " symbol is used to designate characters strings.
All strings must be dimensioned. There is no limit on the length of strings; however, a limit of 99 is imposed for input of strings. String arrays are not allowed. The + cannot be used for concatenation.
Integer variables
Integer variables may contain values of -32767 to 32767.
Not available
Dimensioning variables
No DIMension statement is necessary for arrays, single or multiple, which have subscripts with values of 10 or less. The dimension definition may be a constant, a variable, or an expression.
All character string and numeric arrays must be dimensioned.
Significant digits
Numeric values may contain nine significant digits and are rounded if necessary.
Numeric values may contain nine significant digits and are truncated if necessary.
Scientific notation
Scientific notation is accepted for input as well as used to output numbers greater than 9 digits.
Same as PET
Arithmetic operators
+ addition - subtraction * multiplication / division • exponentiation
Same as PET except • for exponentiation.
Physical line
40 characters
38 characters
Logical line
80 characters
114 characters
Multiple Statements/line
Multiple statements are allowed and are separated by a : symbol.
Same as PET
Program Documenting
REM statements allow commenting in the body of your program.
Same as PET
Assignment
Keyword for an assignment statement is LET, but is not required. Assignment operator is the = symbol.
Same as PET
Looping
Looping may be accomplished by using the FOR-NEXT-STEP statements. The STEP value may be an integer or fraction, positive or negative (therefore allowing the value of the index to ascend or descend). Whatever the beginning and ending values of the index are, the loop will be executed at least once. A single NEXT statement may be used to match multiple FOR statements. For example: NEXT X,Y,Z.
Same as PET except the same NEXT may not be used for multiple FOR statements. Also, NEXT must be followed by its variable. PET allows NEXT with an implied variable.
Input
The INPUT statement may have a prompt message included which will be presented to the user before the ?. This statement may be used with all types of variables.
You may not include a prompt message in the INPUT statement. INPUT may not be used with a subscripted variable.
The READ statement may be used for input with corresponding DATA statements. Data may be reused if the RESTORE statement is included appropriately. This type of input may be used with all type of variables.
READ...DATA also may not be used with a subscripted variable.
The GET statement may be used to input a single byte.
GET statement: same as PET, except that it waits for a keystroke.
Branching
Unconditional branching may be accomplished by using the GOTO statement with the statement number of the target statement. Conditional branching options include ON ... GOTO and ON ... GOSUB statements.
The argument of a GOTO or GOSUB may be a variable or an expression.
Subroutines
Subroutines are accessed by the GOSUB statement and need a RETURN statement to indicate the end of the routine.
The command POP can be used to cancel a GOSUB.
Decision-making
The IF - THEN statement uses the conditional operators >, <, >=, <=, =, and the Boolean operators AND, OR, NOT, for comparing both numeric and string variable values. Multiple statements following THEN will be executed if the condition is true.
AND, OR, and NOT do not operate on the binary level.
Output
The PRINT statement may include variables, arithmetic expressions, character strings, and constants. There are four default print positions which are used if items in the list are separated by commas. A semi-colon between items causes closer printing with character strings being concatenated and numbers separated by one space. Cursor movement may be included in strings in the PRINT list. Output is automatically sent to the screen; a special OPEN statement is needed to cause printing on the printer. The ? symbol may be used to represent PRINT when keying in a program. The interpreter will insert the full word for you.
Same as PET except: the semicolon causes concatenation of numbers too. LPRINT is used to send output to the printer. The ? is not spelled out in a program.
Program termination
STOP and END will cause the program to cease execution. There does not have to be and END statement as the last statement in the program. The CONT command will allow you to resume execution after and END or STOP has been encountered.
CONT continues on the next line, not necessarily the next statement.
User-defined functions
DEF FN will allow you to create your own function in BASIC.
User-defined functions are not available in BASIC.
Built-in functions
Standard trigonometric and arithmetic functions are available as well as special purpose functions to do the following: PEEK at memory locations, TAB the cursor to a specified column, SPaCe the cursor the specified number of spaces, indicate the POSition of the cursor, give the number of FREe bytes left in memory, pass a parameter to a USeR machine language program, and communicate with the PET clock. Functions may be nested.
Standard trigonometric and arithmetic functions, FRE, and PEEK are the same as PET. In addition there are CLOG for base 10 logs, ADR to return decimal memory address of specified string, DEG, RAD to specify either degrees or radians for this function. Tab operations are accomplished by keystroke combination, POSITION, or POKE.
Standard string functions are available, as well as special functions to designate substrings. The + symbol is used as the concatenation operator.
Same as PET but no functions for substringing. Substrings are formed by using subscripts with the string variable name to indicate characters in the string. The + is not used for concatenation.
Graphics capabilities
Graphics symbols are accessed by pressing the shift key and the appropriate key (printed on the front of the keys on the PETs with graphic-style keyboards). These symbols may be used in PRINT statements to create displays on the screen. Graphic displays may also be created by using the POKE statement to insert graphic symbols into the screen memory.
The Atari also has special characters, and provides special keywords to make creating graphic displays much easier, such as PLOT, DRAWTO, POSITION, FILL (XIO 18), POKE, and GRAPHICS. There are nine different graphic modes: three for text only, giving normal, double wide, and double size characters; three modes with split screen & four colors; two with split screen and only two colors; and one high resolution mode.
Color capabilities
No color capability
Special keywords are provided to create color displays, such as COLOR which selects one of four color registers, and SETCOLOR to specify the hue and luminance of each color register. By using a combination of 16 hues and 18 luminance settings 128 colors can be created.
Sound capabilities
Sound is achieved by using the POKE statement to cause signals to be sent to the parallel user port to which is attached an external device to produce sound. Rhythm is controlled by using timing loops. Non-Commodore products are available for the PET to produce four-voice music similar to the Atari.
Atari provides a SOUND statement which allows specification of voice, pitch, distortion, and volume. Four voices can be played at the same time. Control of distortion creates interesting sound effects. Rhythm is controlled by timing loops. The sound is heard through a speaker in the TV monitor.
Game I/O
No special statements or functions are available to aid in game interaction.
Four functions are provided for ease in programming paddle and joystick control. They are PADDLE and STICK to control movement, and PTRIG and STRIG to control the trigger button.
Files
Files must be OPENed before use with parameters specifying logical file number, device number, secondary address (permits intelligent peripherals to operate in any number of modes), and file name (for tapes, name may be up to 128 characters. Only 16 characters are used by the system, though). The CLOSE statement is used to close a file and needs only the logical file number as a parameter. PRINT#, INPUT#, GET# are used with tape or disk file I/O. Tape files are recorded twice to aid in checking for errors.
Files must be OPENed before use with parameters specifying logical file number, type of operation (read, write, both), file name (8 characters or less) and device type. PRINT#, INPUT#, PUT#, GET#, and XIO may be used for I/O operations. NOTE and POINT are functions provided to facilitate creation of random access files.
Commands
In addition to the standard commands of NEW, LIST, RUN, CONT, LOAD, SAVE, and POKE, the PET has a VERIFY command to allow tape files to be verified before erasing memory, and a CMD command to keep the IEEE-488 Bus actively listening. The LOAD and SAVE commands may include a file name.
Atari commands are the same as PET except that Atari has no VERIFY or CMD commands and file names may not be used with the CLOAD and CSAVE commands. Program files can be located on the tape by means of the counter on the cassette.
Error correction & editing
You may erase characters or an entire line while typing. Later editing of programs is possible by cursor control and line deletion, by typing the line number and RETURN. Duplication of lines is possible by first LISTing the line, changing the line number, and pressing RETURN.
Same as PET, with the addition of three editing functions: insert line, delete line, and backspace (not the same as delete).
Error messages
For syntax errors, the line number is given, but not the cause of the error. For execution errors, the error message and line number are printed on the screen.
Syntax errors are indicated by printing the line and showing the error in reverse video. Execution errors will cause a message to appear on the screen giving you an error message to look up in your manual.
REFERENCES:
1. Bob Albrecht, Leroy Finkel, Jerald R. Brown, Atari BASIC. John Wiley & Sons, Inc., New York (1979)
2. Carol Shaw, Keith Brewster. BASIC REFERENCE MANUAL. draft, Atari, Inc., Sunnyvale, CA (1979)
3. CBM User Manual, First Edition. Commodore Business Machines, Santa Clara, CA (1979)
4. Atari 400 Operators Manual. Atari, Inc., Sunnyvale, CA (1979)
5. Atari 800 Operators Manual. Atari, Inc., Sunnyvale, CA (1979)
Return to Table of Contents | Previous Section | Next Section